

Have you ever walked into your garage, admired your brand-new epoxy floor installation, and suddenly noticed streaks, bubbles, or peeling corners you never expected? Fixing these frustrations may be easier—and faster—than you think. Discover the expert secrets to transforming your epoxy flooring in just 24 hours!
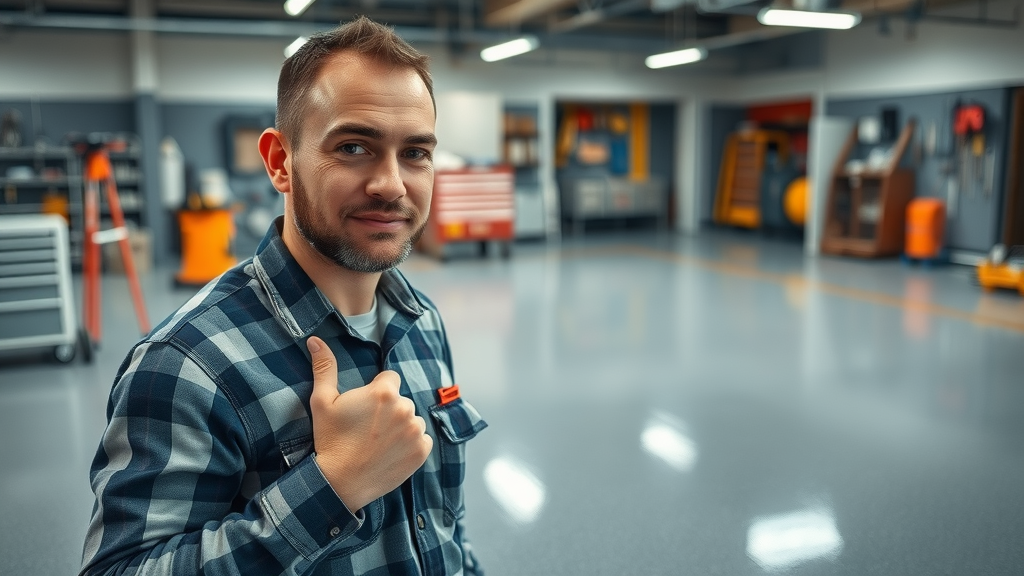
Are You Frustrated With Your Epoxy Floor Installation?
Epoxy floor installation should leave you with a seamless, glossy surface—but for many homeowners, reality doesn’t meet expectation. If you’re seeing bubbles, peeling, or uneven patches after your garage floor or concrete floor project, you’re not alone. Epoxy floor coatings are highly durable, but only if installed precisely and with careful attention to detail. Unfortunately, many DIY attempts or rushed jobs fall short, creating the need for fast, reliable solutions. Addressing these epoxy flooring problems quickly ensures your floor isn’t just visually appealing, but also tough enough to withstand years of use.
Whether your epoxy floor has begun to lift, discolor, or simply dry with visible imperfections, a range of quick fixes and professional insights can help you solve these challenges. This guide will demystify the process and empower you to transform your concrete or garage floor without extended downtime. With the right information and hands-on steps, you’ll restore your epoxy coating’s flawless finish and long-term durability—often in less than a day.
Have you ever wondered why your garage floor epoxy installation didn’t turn out as flawless as you imagined?

What You’ll Learn in This Guide to Epoxy Floor Installation
Common epoxy flooring mistakes to avoid
Quick fixes for concrete floor installation issues
Pro tips for achieving a durable epoxy coat
Comparing epoxy coatings to other flooring options
Understanding Epoxy Floor Installation: Opinion Matters
There’s no denying the stunning finish and practicality that make epoxy floor installation a top choice for garages and commercial spaces. However, personal and professional experiences reveal that the choices you make at every step—from surface prep to epoxy resin mixing—heavily impact your final results. Overlooking small details such as moisture in your concrete floor, improper mixing ratios, or skipping the all-important acid wash can sabotage your project. In my opinion, a little extra care at the start prevents hours of headaches repairing bubbling or peeling epoxy coatings later.
Expert installers suggest meticulous cleaning routines, including the use of muriatic acid for etching and acid wash to remove contaminants. Not only do these methods ensure maximum epoxy resin adhesion, but they also extend the life of your garage floor finish. Additionally, details such as room temperature, humidity, and personal safety equipment matter greatly—your installation is only as strong as its weakest step. Listen to skilled voices in the industry: don’t rush the prep work and don’t cut corners when applying epoxy if you want results that endure.
Why Proper Epoxy Flooring Techniques Are Essential
Every successful epoxy floor installation starts with the right methods. Skipping even a single prep step can ruin the beautiful shine and seamless effect that epoxy flooring promises. Proper epoxy coating application requires a dust-free, oil-free, and perfectly dry concrete surface, which often means taking time for comprehensive acid wash and surface cleaning beforehand. This investment in preparation ensures that the epoxy resin and hardener bond securely and eliminate air gaps that cause unsightly blisters or bubbles.
Incorrect concrete moisture levels, improper trowel use, or neglecting to remove debris lead to a garage floor susceptible to chips, bubbles, and flaking. Experts repeatedly emphasize that following the manufacturer’s instructions for epoxy paint, along with proper mixing and applying the coating within set temperature ranges, makes the difference between a durable, high-gloss epoxy floor and a failed project needing early repairs. Rushing through the process or improvising with generic floor coatings often results in preventable defects.
The Impact of Garage Floor Preparation on Epoxy Coating Longevity
Preparation isn’t just about a clean workspace—it fundamentally defines the lifespan of your epoxy floor coatings. Failing to address cracks, moisture, and dirt leaves the underlying concrete floor vulnerable, leading almost inevitably to early coatings failure. Using a professional-grade epoxy coat is crucial, but without correct prep—including degreasing and muriatic acid etching—your efforts may not last beyond the first few months of heavy use.
The pros also recommend testing for vapor emissions before applying epoxy: high moisture rushes up through porous concrete floors, disrupting adhesion and accelerating peeling. Following every support of the purposes explained in professional installation guides—such as achieving the correct floor texture (not too smooth, not too rough)—makes your epoxy floor installation not only attractive but built to endure for years. The little details define success and extend your epoxy flooring value over costly alternatives.
Common Epoxy Floor Installation Issues and How to Fix Them
Peeling epoxy coatings on garage floor and concrete floor
Uneven epoxy resin surfaces on concrete floors
Blistering and bubbles in epoxy paint applications

Homeowners often worry when their epoxy floor begins to peel, bubble, or form rough patches after installation. These flaws are usually the result of inadequately prepared concrete floors, moisture migration, or improper epoxy resin mixing. Peeling occurs when the epoxy coat cannot adhere to oily or dusty surfaces, while bubbles may form if air is trapped during applying epoxy or if the floor is not sealed against moisture rising from beneath. Similarly, unevenness points to rushed spreading techniques or missed spots when using your roller or trowel.
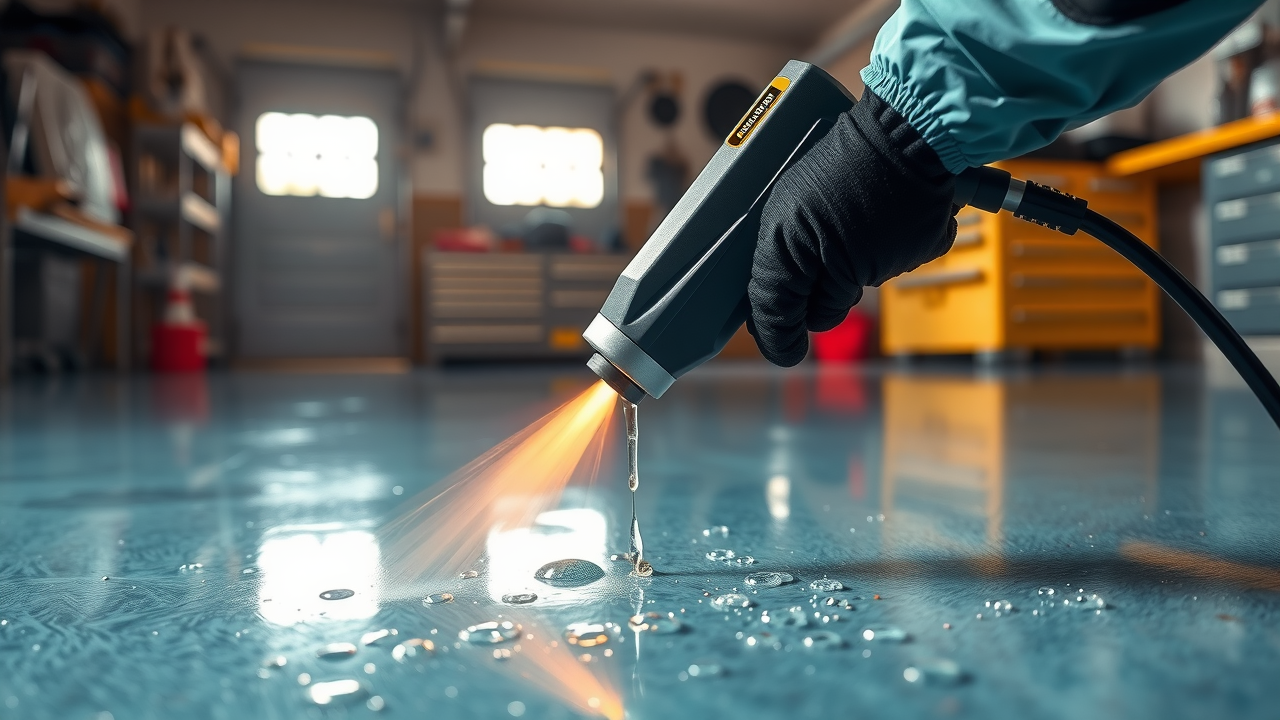
Quick fixes involve scraping up damaged coating, sanding the area smooth, and thoroughly cleaning before re-applying a new epoxy coat. For bubbles, a gentle pass with a heat gun can bring trapped air to the surface and smooth the finish. It’s also essential to ensure the right ratio of epoxy resin and hardener; improper mixing causes sticky or brittle patches that are prone to further damage. Always allow each layer to dry fully before applying the next to maximize durability and gloss.
Expert Opinion: Epoxy Flooring vs. Alternative Flooring Solutions
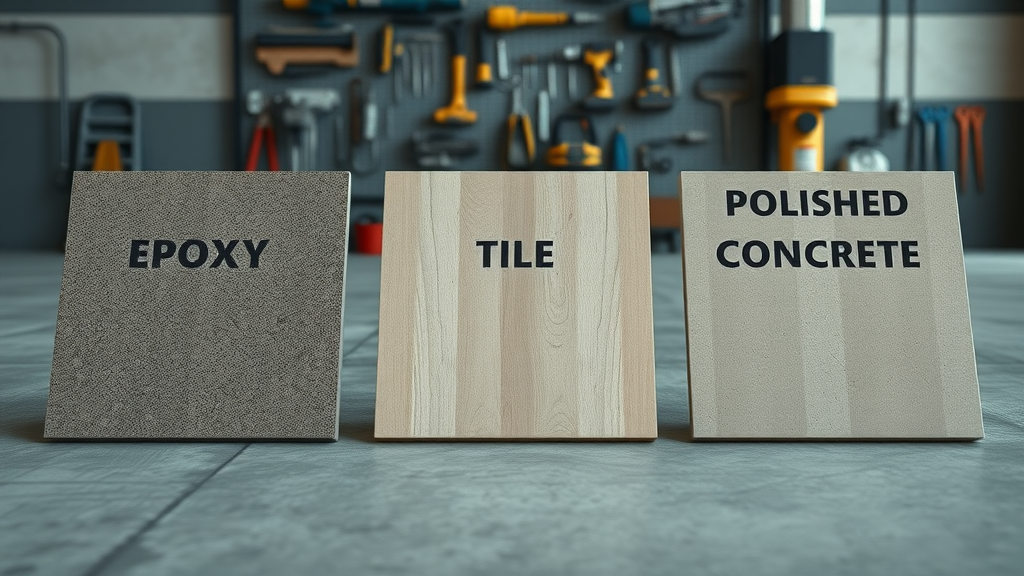
Choosing between epoxy floor installation and other options like tiling or polished concrete rests on several factors: labor cost, durability, application time, and desired aesthetics. In my experience, a properly installed epoxy coat offers impressive endurance and visual brilliance compared to alternatives that may stain, crack, or need regular sealing. While garage floor tiles are quick to lay and polished concrete offers a natural industrial look, neither can replicate the seamless, waterproof properties and fast repair ease of epoxy flooring.
Many homeowners also prefer epoxy because of its cost-per-square-foot value and minimal downtime during installation or repair. If you value a resilient and customizable finish for your garage floor, investing in a quality epoxy coating pays off—especially in spaces exposed to chemicals, heavy vehicles, or foot traffic. Let’s break down how epoxy compares with other floor coatings on the essentials that matter to both cost and performance.
Epoxy Floor vs. Tiling vs. Polished Concrete Floor: Cost, Durability, and Installation Time |
|||
Flooring Type |
Average Cost (per sq ft) |
Durability |
Installation Time |
|---|---|---|---|
Epoxy Floor |
$4–$10 |
High (10–20 years) |
1–2 days |
Tiling |
$7–$15 |
Medium (7–15 years) |
2–5 days |
Polished Concrete |
$3–$12 |
High (10–20 years) |
2–4 days |
"In my experience, a properly installed epoxy coat outlasts many traditional garage floor options."
Fast Solutions: Fixing Epoxy Floor Installation Problems in Under 24 Hours
Speed is often crucial when addressing epoxy floor installation issues—especially in busy homes or active garages. Fortunately, many defects like peeling, uneven coverage, or surface bubbles can be fixed with the right approach and tools within one day. Whether you’re dealing with a fresh mishap or a recurring epoxy resin problem, having a well-organized kit and following best practices for re-application makes all the difference.
Begin by isolating the troublesome area and removing any loose or flaking material from your concrete floor. Clean thoroughly using degreasers or acid wash if needed, and ensure complete drying before applying a new epoxy coat. With the correct ratios of resin and hardener, plus sufficient ventilation, even a novice can restore their garage floor to a flawless, durable finish before the day is done. Let’s break down the essentials for a rapid repair.
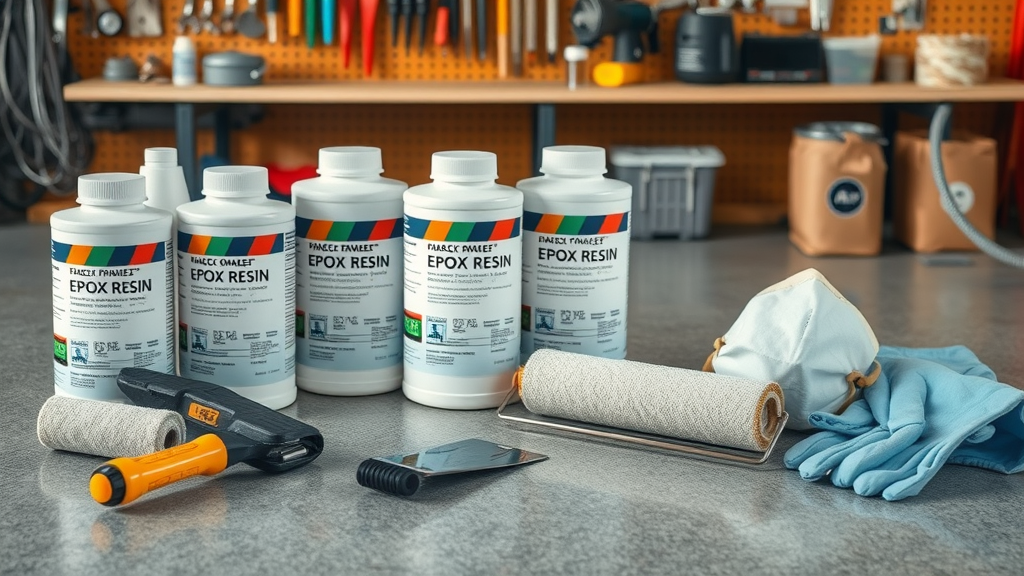
Tools and Materials Needed for Garage Floor Repairs
Epoxy resin and compatible hardener
Concrete floor cleaning supplies
Application trowel and roller
Personal safety equipment
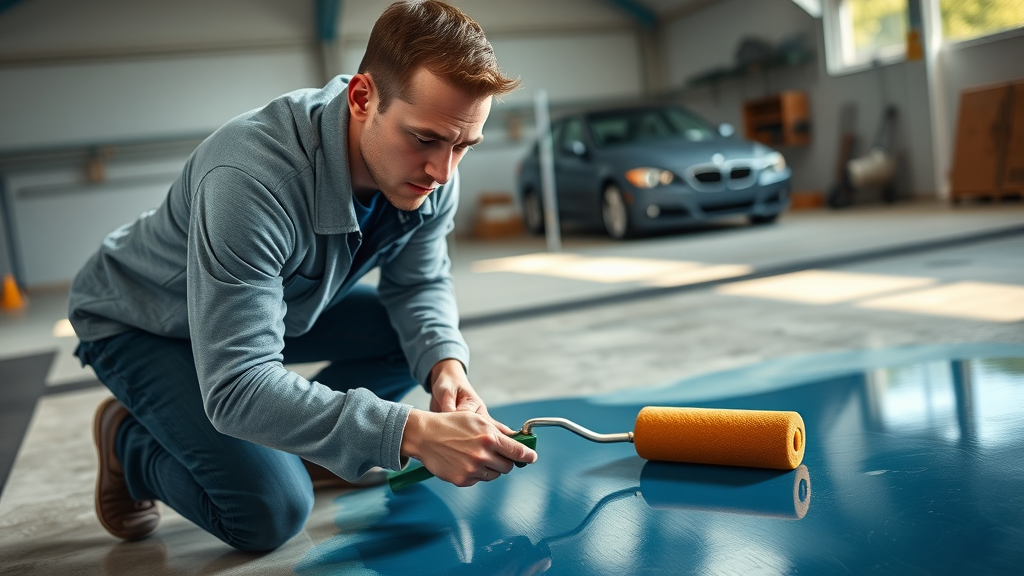
Step-by-Step Applying Epoxy for Fast Results
1. Surface Prep: Sweep, vacuum, and wash the area with an approved degreaser or acid wash. Let the surface fully dry to prevent trapped moisture from causing further damage.
2. Mixing: In a clean container, blend epoxy resin and hardener using the manufacturer’s recommended ratio. Mix thoroughly—improper mixing results in sticky or brittle patches that won’t cure properly.
3. Application: Use a roller or trowel to spread the epoxy coating evenly over the floor. Move methodically in sections, leveling bubbles with a heat gun as you work.
4. Curing: Allow the new epoxy coat to cure for the specified time (typically 12–24 hours before foot traffic). Maintain good airflow to speed up curing and ensure a glossy, even finish.
People Also Ask About Epoxy Floor Installation
Watch our explainer video on how to install an epoxy garage floor—covering everything from concrete floor surface prep and mixing to applying epoxy and ensuring a long-lasting finish.
How much does it cost to install an epoxy floor?
The cost of epoxy floor installation typically ranges from $4 to $10 per square foot for a standard residential garage. This figure can vary based on the condition of your concrete floor, chosen epoxy system, and local labor cost. DIY installations usually cost less, but hiring a professional can help ensure a flawless, durable finish and save time by addressing common issues upfront.
Is epoxy flooring difficult to install?
Epoxy flooring requires meticulous surface preparation, correct mixing, and precise applying epoxy techniques, making it more challenging than simply painting a wall or laying tile. Inadequate cleaning, skipping the acid wash, or not following the right mixing ratios can quickly lead to bubbling, peeling, and an uneven surface. However, with patience, research, and attention to detail, even DIYers can achieve professional-quality epoxy floor coatings.
Can I epoxy my floor myself?
Yes, many homeowners successfully apply epoxy coatings as a DIY project—but it’s essential to follow surface prep, mixing, and application instructions precisely. Not investing in proper personal safety equipment or skipping key steps like testing for moisture in your concrete floor can affect the longevity and look of your finished floor. Reviewing trusted guides and supplier recommendations ensures better results.
Is epoxy flooring cheaper than tiling?
In most cases, epoxy floor installation is less expensive per square foot than professional tile installation, especially after factoring in relative labor cost and minimal downtime. Epoxy coatings also feature fewer seams, lower ongoing maintenance requirements, and longer durability in high-impact spaces like garages or commercial workshops.
Epoxy Floor Installation: List of Quick Fixes for Common Issues
Correcting uneven epoxy coatings with re-application
Eliminating air bubbles using a heat gun
Properly mixing epoxy resin and hardener
Ensuring concrete floors are clean and dry
Epoxy Floor Installation FAQs
What is the best type of epoxy for a garage floor?
The best type is a 100% solids epoxy resin system, which offers superior durability and chemical resistance for busy garage floor environments.How do I prevent yellowing of my epoxy floor?
Choose UV-stable epoxy coatings or add a polyurethane topcoat to protect against discoloration from sunlight over time.Can epoxy coatings be applied over old paint?
Ideally, remove old paint with proper surface prep to ensure strong adhesion. Epoxy floor coatings adhere best to raw, etched concrete floor surfaces.How long do epoxy floors last?
With correct installation and maintenance, epoxy flooring can last 10–20 years, even in high-traffic or commercial settings.
Key Takeaways: Mastering Epoxy Floor Installation
Meticulous preparation ensures epoxy flooring success
Garage floor epoxy coat can be fixed rapidly with proper steps
Epoxy floor installation offers cost-effective durability over alternatives
Conclusion: Transform Your Garage Floor with Expert Epoxy Floor Installation
Take control of your epoxy floor installation and turn any surface into a stunning, hardworking masterpiece—in less than 24 hours, with the right techniques and care.
Ready for Flawless Epoxy Floor Installation?
Call us now to get your free quote!!
To enhance your understanding of epoxy floor installation and address common issues effectively, consider exploring the following resources:
“How To Epoxy A Garage Floor: A Step-by-Step Guide” (angi.com)
This comprehensive guide provides detailed instructions on preparing and applying epoxy coatings to garage floors, emphasizing the importance of surface preparation and proper application techniques.
“Epoxy Floor Step-by-Step Installation Process” (superiorfloorcoatingsohio.com)
This resource outlines the critical steps involved in epoxy floor installation, from surface preparation to the application of primer and topcoats, ensuring a durable and long-lasting finish.
By consulting these guides, you’ll gain valuable insights into achieving a flawless epoxy floor installation and effectively addressing common challenges.


Write A Comment